During the season we have multiple DPI competitions (digital projected image), for which the entry requirements ask for your images to be resized appropriately. In this tutorial we are going to show you how to achieve this using Adobe Photoshop, GIMP 2, and Adobe Lightroom.
For competition, typically the size requested is a maximum of 1600px wide by 1200px high; this is the case for North Fylde’s internal competitions, but also most of the external competitions as well. So for this tutorial we will be working to those dimensions. Additional rules state the image must be below 2Mb in file size, but in almost all cases the dimensions above will create a file size below that limit, so we won’t be covering that is this topic.
Although there are many ways to achieve the desired results in each of the programs we are looking at, we are only going to cover one simple method for each application. In each case
Adobe Photoshop
- Open the photograph, File > Open…
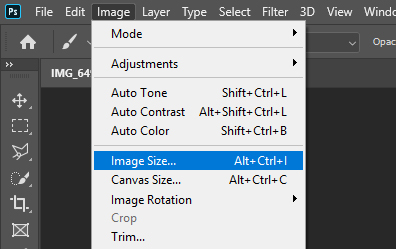
- In the top bar, go to Image > Image Size…
- Check that the “linked” option is enabled, the Width and Height options will be joined together by a line and a chain icon.
- Make sure the units for the width and height are in pixels.
- Now change only the longest, either height or width, to match the maximum 1600 or 1200. You will notice the remaining dimension also updated at the same time.

- Check the width and height are now both either the maximum or below, and press “OK”.
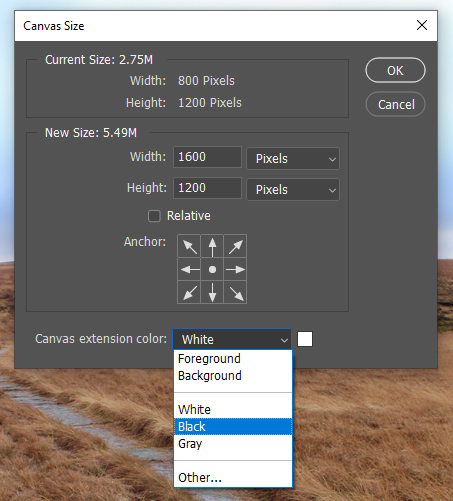
- We recommend that for the best viewing in DPI competitions, you now add some padding to the image to make it fit the 1600×1200 canvas exactly. To do this open Image > Canvas Size… from the top bar, change the units to pixels, and if either width or height is below their maximum of 1600px or 1200px update it, then change the canvas extension color to black, and press “OK”.
- The image is now correctly sized. Go to File > Save As…, choose a name and location to save the photograph, change the “Save as type” to JPEG, and press “Save”.
GIMP 2
- Open the photograph, File > Open…
- In the top bar, go to Image > Scale Image…
- Just below the header “Image Size” are the width and height boxes. Before editing these check the units to the side are in pixels, and that the chain icon is closed, not broken.
- Now change only the longest, either height or width, to match the maximum 1600 or 1200, and press the enter key. You will notice the remaining dimension also updated.
- Check the width and height are now both either the maximum or below, and press “Scale”.
- We recommend that for the best viewing in DPI competitions, you now add some padding to the image to make it fit the 1600×1200 canvas exactly. To do this first change the background color in your toolbar to black, that’s the black rectangle area in the below image
 then open Image > Canvas Size… from the top bar, change the units to px, and if either width or height is below their maximum of 1600px or 1200px update it. Next press the “Centre” button, change Resize Layers to “All Layers”, change Fill with to “Background color”, and press “Resize”.
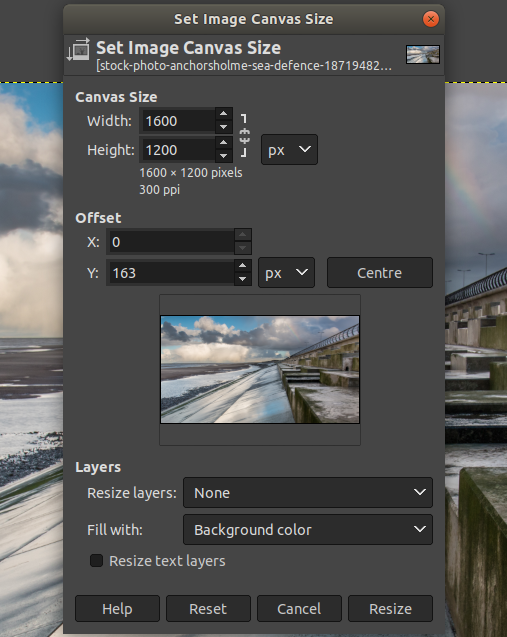
- The image is now correctly sized. Go to File > Export As…, choose a name (ending in .jpg) and location to save the photograph, and press “Export”.
Adobe Lightroom
- If you have not already, import the photograph into the library.
- Select the image or images in the library.
- Lightroom will resize the image when it is exported, so we will go straight to the to bar choose File > Export…
- In the Export Location section, choose where to export the image(s) to.
- In the File Naming section, choose how to name the image(s). Remember it is possible to have Lightroom generate the names using the image title etc. or simply choose “Custom Name”.
- In the File Settings section, set the Image Format to JEPG.
- In the Image Sizing section, check “Resize to Fit”, and in the drop-down select “Width & Height”.
- Still in the Image Sizing section, make sure the units are in pixels, and set W: and H: to 1600 and 1200 respectively.
- Finally press the “Export” button at the bottom and the image(s) will be exported to the chosen location.
Note: In Adobe Lightroom we are not able to add the recommended padding to the image. If this is something you wish to do then please open your exported image in another editor, and adjust the canvas size. (Adobe Photoshop step 7, GIMP 2 step 6)
Keep in Mind
There are other programs and applications available that will also provide the ability to resize your photographs, and also other ways to achieve the same results.
The instructions in this article might not exactly match up to the version of software you have, but the naming and principles have tended to stay roughly the same. Hopefully this information helps to point you in the right direction.
File names for internal competition are requested to be in the following format:
<Title> – <Category> – <Membership Number>.jpg
Example:
Blackpool Beach – General Colour – 22.jpg
Finally resizing your photograph should be the one of the last thing you do. Make all your other edits and adjustments before resizing, to help retain the quality.
Happy editing!